How to Create a Website Banner?

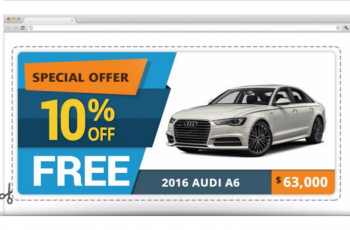
Have you ever thought about what makes your website great and attractive? Try to come up with something that has eye-catching colors and few sentences but still be non-less informative. Your banner is like a 30-seconds commercial to catch visitors on attractive things in your site. All you need to do is choose images, fonts and colors you like and a professional banner could be yours in a matter of minutes.
In our today’s How to guide, we’re going to show you a simple process of creating a website banner in DWS within Make-A-Page.
Follow these simple steps and create an outstanding banner:
Step 1. Log in to the backend of your website and select Make-A-Page under menu Tools.

Step 2. Click on Header at the left side and click on the wrench to edit the given page.

Step 3. Drag and drop the “HTML” widget to the given page.

Step 4. Click on the wrench to configure the widget.

Step 5. In Editor remove text “EDITABLE HTML BLOCK” and click on “Image” icon.

Step 6. In the open window click on “Browse Server”.

Step 7. Then click on the green Upload arrow to upload images from your PC.

Step 8. After image downloads, click on it twice and image will appear in Preview.

Step 9. In Preview you can set width,height, border and alignment for the given image. Note: width of image must not exceed the width of the page where banner will be placed.

Step 10. When you add the image for the banner, click Ok and then click “Save Changes” button.

Step 11. Add any other text to your banner, simply drag and drop another “HTML” widget

Step 12. Click on wrench of this “HTML” widget.

Step 13. In open Editor, you can add your dealership name(phone number and so on), make any style,font name,font size, text color and after editing text, click on “Save Changes”.

Step 14. To put the given text on the banner, click on free movement icon.

Step 15. To change the size of window with text, put mouse pointer on the right bottom corner of the window and move the mouse pointer to the left/right/up/down until you get the desired size.

Step 16. To add address and phone number to the banner, drag and drop “Phones List” widget to the given page.

Step 17. To make this widget transparent, click on wrench of the widget, select null style for this widget to be transparent and click the”Save Changes” button.


Step 18. To put the address and phone number on the banner, click on free movement icon.

Step 19. To change the size of window , put mouse pointer on the right bottom corner of the window and move the mouse pointer to the left/right/up/down until you get the desired size.

Step 20. To add dealer’s logo to the banner, drag and drop “Logo” widget to the given page and click on free movement icon to place it on the banner.
Note: make sure,that you have logo in Settings=>Dealership=>General Information and for the best results on forms use 250x80px logo.


Step 21. Click on Activate Page button at top left corner.
We hope this article helped you to learn how to add new menu item in your DWS menu. If you liked this article, then please subscribe to our YouTube Channel for Autoxloo’s video tutorials. You can also find us on Twitter and Facebook.